Nine original source-rig profiles for Cinema 4D: horse, cat, dog, snake, monkey, alligator, rhino, bat and bird.
The source rigs
Four legs, neck, head, ears and articulated tail.Four legs, neck, head, ears and articulated tail.Four legs, neck, head, ears and articulated tail.Head and a 24-part flexible body / tail chain.Arms, hands, finger tips, legs and a six-part tail.Low body, long muzzle, four splayed legs and a ten-part tail.Four legs, neck, head, ears and articulated tail.Articulated wings, head, jaw, legs and tail; wing-finger tips and ears.Articulated wings, head, jaw, legs and tail.
Capture your first take
Choose the animal profile and Choose video. Use a clear, steady view with visible body features.
Select Side, Front or Top to match the camera. Snake defaults to Top; bat, bird and monkey default to Front.
Click Align animal box and drag a rectangle over the animal. This positions a starting template; it does not detect the animal automatically.
Drag each point onto its anatomical joint. Select a name in Joint Controls to identify it. Mark hidden joints as not visible instead of placing them on background features.
Choose two visible reference landmarks and enter their real span in metres. Apply scale. For a side view, muzzle-to-tail is a useful starting reference; for front-view flight, use the wing tips.
Set the clip start/end and Capture FPS. Click Track clip. Use clips up to ten minutes and split long footage into shorter takes.
Review red points and low-confidence samples. Scrub to the first error, drag the point to the correct landmark, then click Track from here. Corrections are reused when that frame is reached.
Adjust Guided depth for selected joints where needed. Depth keys interpolate between marked frames. Save the project; the File menu also provides recovery from local autosave.
Click Export BVH. Open the .bvh in Cinema 4D R26 and press Play. The export contains actual joints and animation channels. With licensed Cinema 4D installed, optional native .c4d and .fbx files are also created.
Interface example
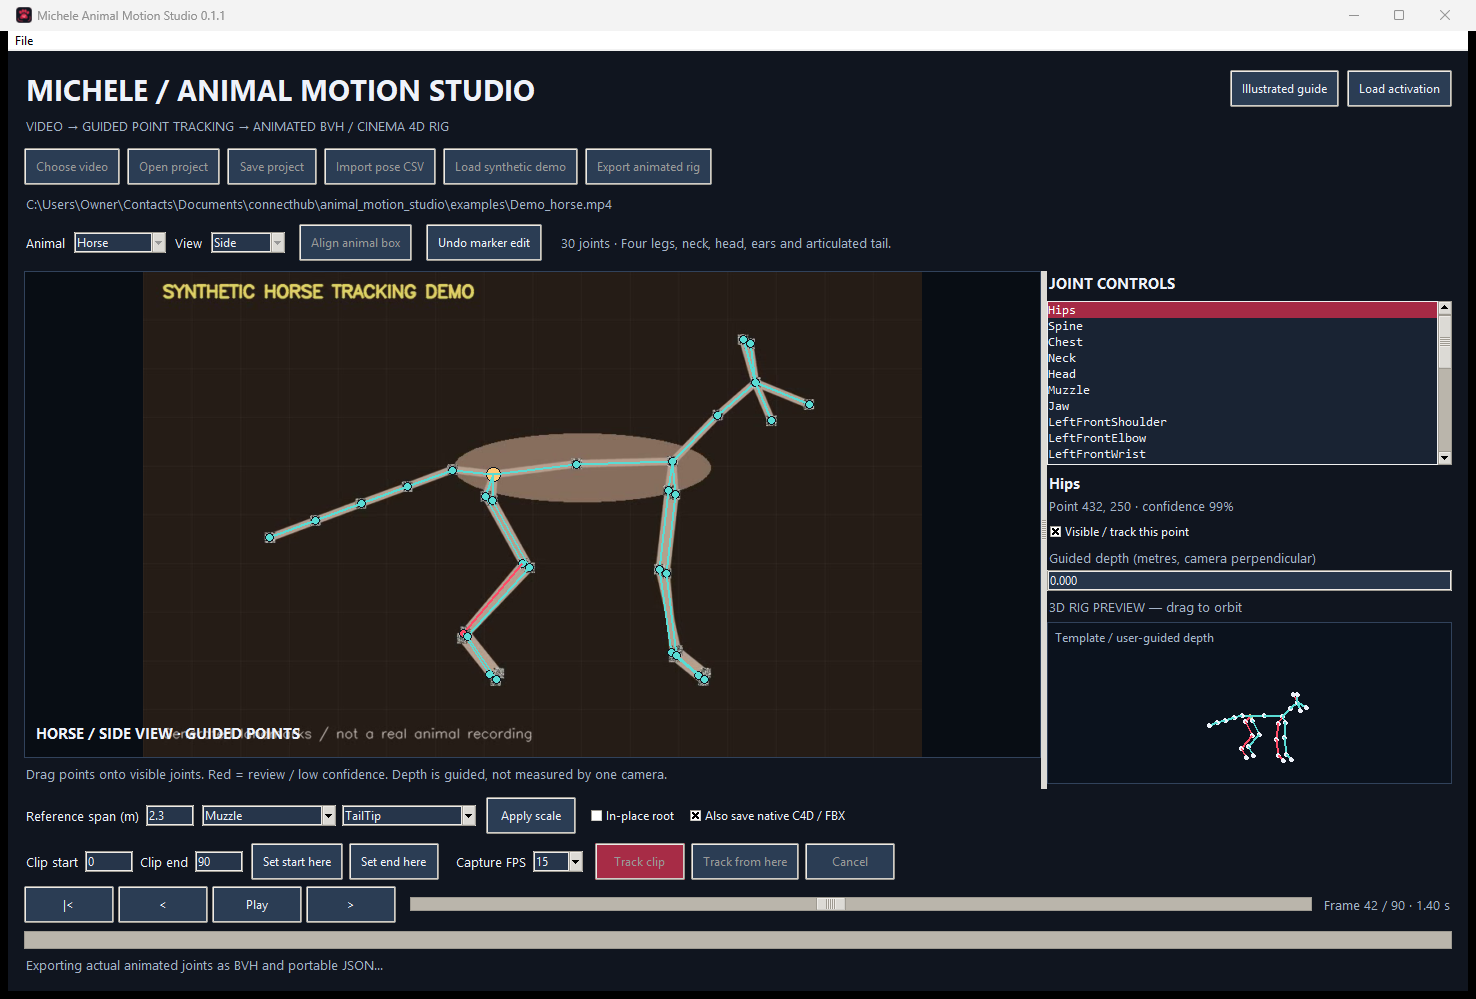
The included horse video is a clearly labeled synthetic fixture, not real animal footage or an accuracy claim on real animals.
Retargeting in Cinema 4D
Open the exported BVH or C4D scene and inspect Hips, spine, limbs, head, tail and wing joints.
Align and scale the source skeleton to your prepared character. Match named joints using Character Definition / Solver or appropriate constraints.
Your animal mesh needs skin weights to deform with these joints. A skeleton alone does not create skin weights, clothing or muscle deformation.
Keep neutral transforms and test facing direction. Left and Right mean the animal's own sides. The root is named Hips for compatibility, including snake and bird profiles.
Save and reopen a working copy. Check the head, feet / claws, tail and wings before rendering. Extra End Site joints on import are expected.
Import pose-model data
The app reads DeepLabCut-style CSV with scorer / bodyparts / coords header rows, or long-form CSV:
X/Y are pixels in the original video. Load that video first so image dimensions and FPS match. Use File → Export joint naming map to see exact names. If a model uses other names, save take.mapping.json beside take.csv, with entries such as {"nose":"Muzzle","tail_end":"TailTip"}. Unmatched points remain marked for review.
Animal-specific models can be prepared outside this app. See the official DeepLabCut Model Zoo for supported domains. Check model coverage against the actual animal and camera view.
Installation and activation
Run Setup Animal Studio.cmd with Python 3.10 / Tkinter installed. Setup creates a private environment with OpenCV, NumPy and Pillow, then adds a desktop shortcut. Launch Start Animal Studio.cmd. Activate with an Animal Studio serial / license supplied by Michele. The private generator and signing keys are not included.
Video processing and projects remain local. Original source video is not modified.
ConnectHub plans
Free membership supports 15-second file clips; Short Clip ($4.99/month) supports 30 seconds per clip. Full Studio ($9.99/month) supports animal takes up to the ten-minute technical limit. Download your personal Animal activation from your studio account. Paid access is limited to the paid period. A purchased standalone seller serial needs no ConnectHub monthly subscription.
Use Animal capture in your browser at connecthub.tv/michele_animal.php or in the Windows desktop app. Both export BVH for Cinema 4D R26.
BVH in Cinema 4D R26
The basic-rigs folder includes a BVH skeleton and native C4D scene for each animal. For captured motion, click Export BVH. Native C4D / FBX conversion is optional.
Inside R26, open cinema4d/Create_Animal_Rig.py in Script Manager and execute it to choose a skeleton. To export your animated animal, select its Hips joint or parent rig group, set the preview range, and run cinema4d/Export_Animal_BVH.py. Keep the scripts with the companion files in the extracted package.